Nx:构建企业级Monorepo应用程序的新方法
现代Web开发工具。
使用Nx,您可以:
- 使用Cypress,Jest,Prettier,TypeScript等现代工具......
- 使用Angular和Node.js构建全栈应用程序
- 使用Google,Facebook和Microsoft开创的有效开发实践
TLDR
npx create-nx-workspace myapp --preset=angular
cd myapp
ng serve myapp
创建Nx工作区
运用 npx
npx create-nx-workspace@latest myworkspace
运用npm init
npm init nx-workspace myworkspace
运用yarn create
yarn create nx-workspace myworkspace
添加到现有Angular CLI工作区
如果您已经有一个常规的Angular CLI项目,则可以通过运行以下命令来添加Nx:
ng add @nrwl/workspace
添加功能
如果您尚未指定任何预设,您将获得一个空的Nx工作区。没有用于构建,服务和测试的应用程序。您可以运行以下命令向工作区添加功能:
运用 npm
npm install --dev @nrwl/angular # Adds Angular capabilities
npm install --dev @nrwl/web # Adds Web capabilities
npm install --dev @nrwl/react # Adds React capabilities
npm install --dev @nrwl/node # Adds Node capabilities
npm install --dev @nrwl/express # Adds Express capabilities
npm install --dev @nrwl/nest # Adds Nest capabilities
运用yarn
yarn add --dev @nrwl/react # Adds React capabilities
yarn add --dev @nrwl/web # Adds Web capabilities
yarn add --dev @nrwl/angular # Adds Angular capabilities
yarn add --dev @nrwl/node # Adds Node capabilities
yarn add --dev @nrwl/express # Adds Express capabilities
yarn add --dev @nrwl/nest # Adds Nest capabilities
运用ng add
ng add @nrwl/angular # Adds Angular capabilities
ng add @nrwl/web # Adds Web capabilities
ng add @nrwl/react # Adds React capabilities
ng add @nrwl/node # Adds Node capabilities
ng add @nrwl/express # Adds Express capabilities
ng add @nrwl/nest # Adds Nest capabilities
创建第一个应用程序
添加功能后,您现在可以通过以下方式创建第一个应用程序
ng g @nrwl/angular:application myapp
结果将如下所示:
<workspace name>/
├── apps/
│   ├── myapp/
│   │   ├── src/
│   │   │   ├── app/
│   │   │   ├── assets/
│   │   │   ├── environments/
│   │   │   ├── favicon.ico
│   │   │   ├── index.html
│   │   │   ├── main.ts
│   │   │   ├── polyfills.ts
│   │   │   ├── styles.scss
│   │   │   └── test.ts
│   │   ├── browserslist
│   │   ├── jest.config.js
│   │   ├── tsconfig.app.json
│   │   ├── tsconfig.json
│   │   ├── tsconfig.spec.json
│   │   └── tslint.json
│   └── myapp-e2e/
│       ├── src/
│       │   ├── fixtures/
│       │   │   └── example.json
│       │   ├── integration/
│       │   │   └── app.spec.ts
│       │   ├── plugins/
│       │   │   └── index.ts
│       │   └── support/
│       │       ├── app.po.ts
│       │       ├── commands.ts
│       │       └── index.ts
│       ├── cypress.json
│       ├── tsconfig.e2e.json
│       ├── tsconfig.json
│       └── tslint.json
├── libs/
├── tools/
├── README.md
├── angular.json
├── nx.json
├── package.json
├── tsconfig.json
└── tslint.json
Angular CLI在新项目中拥有的所有文件仍然在这里,只是在不同的文件夹结构中,这使得将来更容易创建更多的应用程序和库。
运行应用
ng serve myapp
构建多应用工作区
- 使用Angular和Nest构建一个完整的堆栈应用程序。
- 在前端和后端之间共享代码
创建一个空工作区
npx create-nx-workspace@latest myorg
cd myorg
创建前端应用程序
使用Angular创建一个前端应用程序
ng add @nrwl/angular # Add Angular Capabilities to the workspace
ng g @nrwl/angular:application frontend # Create an Angular Application
这将创建以下内容:
myorg/
├── apps/
│   ├── frontend/
│   │   ├── src/
│   │   │   ├── app/
│   │   │   │   ├── app.component.html
│   │   │   │   ├── app.component.scss
│   │   │   │   ├── app.component.spec.ts
│   │   │   │   ├── app.component.ts
│   │   │   │   ├── app.module.ts
│   │   │   ├── assets/
│   │   │   ├── environments/
│   │   │   ├── favicon.ico
│   │   │   ├── index.html
│   │   │   ├── main.ts
│   │   │   ├── polyfills.ts
│   │   │   ├── styles.scss
│   │   │   └── test.ts
│   │   ├── browserslist
│   │   ├── jest.config.js
│   │   ├── tsconfig.app.json
│   │   ├── tsconfig.json
│   │   ├── tsconfig.spec.json
│   │   └── tslint.json
│   └── frontend-e2e/
├── README.md
├── libs/
├── tools/
├── angular.json
├── nx.json
├── package.json
├── tsconfig.json
└── tslint.json
运行:
ng serve frontend 为应用程序服务
ng build frontend 构建应用程序
ng test frontend 测试应用程序
创建API应用并在前端引入API
添加HttpClientModule到apps/frontend/src/app/app.module.ts:
import { BrowserModule } from '@angular/platform-browser';
import { NgModule } from '@angular/core';
import { HttpClientModule } from '@angular/common/http';

import { AppComponent } from './app.component';

@NgModule({
  declarations: [AppComponent],
  imports: [BrowserModule, HttpClientModule],
  providers: [],
  bootstrap: [AppComponent]
})
export class AppModule {}
编辑apps/frontend/src/app/app.component.ts以从Todos API获取Todos:
import { Component } from '@angular/core';
import { HttpClient } from '@angular/common/http';

import { Observable } from 'rxjs';

interface Todo {
  title: string;
}

@Component({
  selector: 'myorg-root',
  template: `
    <h1>Todos</h1>
    <ul>
      <li *ngFor="let t of (todos | async)">{{ t.title }}</li>
    </ul>
  `
})
export class AppComponent {
  todos: Observable<Todo[]>;

  constructor(http: HttpClient) {
    this.todos = http.get<Todo[]>('/api/todos');
  }
}
由于API不存在,因此尚未显示任何待办事项。所以下一步是使用Nest创建api。
创建一个类似于之前创建Angular应用程序的Nest应用程序:
ng add @nrwl/nest # Add Node Capabilities to the workspace
ng g @nrwl/nest:application api --frontend-project frontend # sets up the proxy configuration so you can access the API in development
这将创建以下内容:
myorg/
├── apps/
│   ├── frontend/
│   ├── frontend-e2e/
│   └── api/
│       ├── src/
│       │   ├── app/
│       │   │   ├── app.controller.spec.ts
│       │   │   ├── app.controller.ts
│       │   │   ├── app.module.ts
│       │   │   ├── app.service.spec.ts
│       │   │   ├── app.service.ts
│       │   ├── assets/
│       │   ├── environments/
│       │   └── main.ts
│       ├── jest.config.js
│       ├── tsconfig.app.json
│       ├── tsconfig.json
│       ├── tsconfig.spec.json
│       └── tslint.json
├── libs/
├── nx.json
├── package.json
├── tools/
├── tsconfig.json
└── tslint.json
apps目录是Nx放置运行应用的地方:前端应用程序,后端应用程序,e2e测试套件等。
Nest是一个很棒的框架,它与Angular分享了许多核心概念。它使用模块,提供程序,依赖注入等。因此,大多数Angular开发人员发现Nest易于使用。
运行API应用
ng serve api 为应用程序服务
ng build api 构建应用程序
ng test api 测试应用程序
生成的apps/api/src/app/app.module.ts内容如下所示:
import { Module } from '@nestjs/common';

import { AppController } from './app.controller';
import { AppService } from './app.service';

@Module({
  imports: [],
  controllers: [AppController],
  providers: [AppService]
})
export class AppModule {}
- 如果您愿意express,请改为运行以下命令:
ng add @nrwl/express # Add Express Capabilities to the workspace
ng g @nrwl/express:application api --frontend-project frontend
添加API接口
现在,通过更新添加接口以获取待办事项 app.service.ts
import { Injectable } from '@nestjs/common';

export interface Todo {
  title: string;
}

@Injectable()
export class AppService {
  getTodos(): Todo[] {
    return [{ title: 'Fix my computer!' }, { title: 'Fix my desk' }];
  }
}
和 app.controller.ts
import { Controller, Get } from '@nestjs/common';

import { AppService, Todo } from './app.service';

@Controller()
export class AppController {
  constructor(private readonly appService: AppService) {}

  @Get('todos')
  getTodos(): Todo[] {
    return this.appService.getTodos();
  }
}
现在,运行ng serve & ng serve api并打开http:// localhost:4200以查看前端和后端是否正常工作:
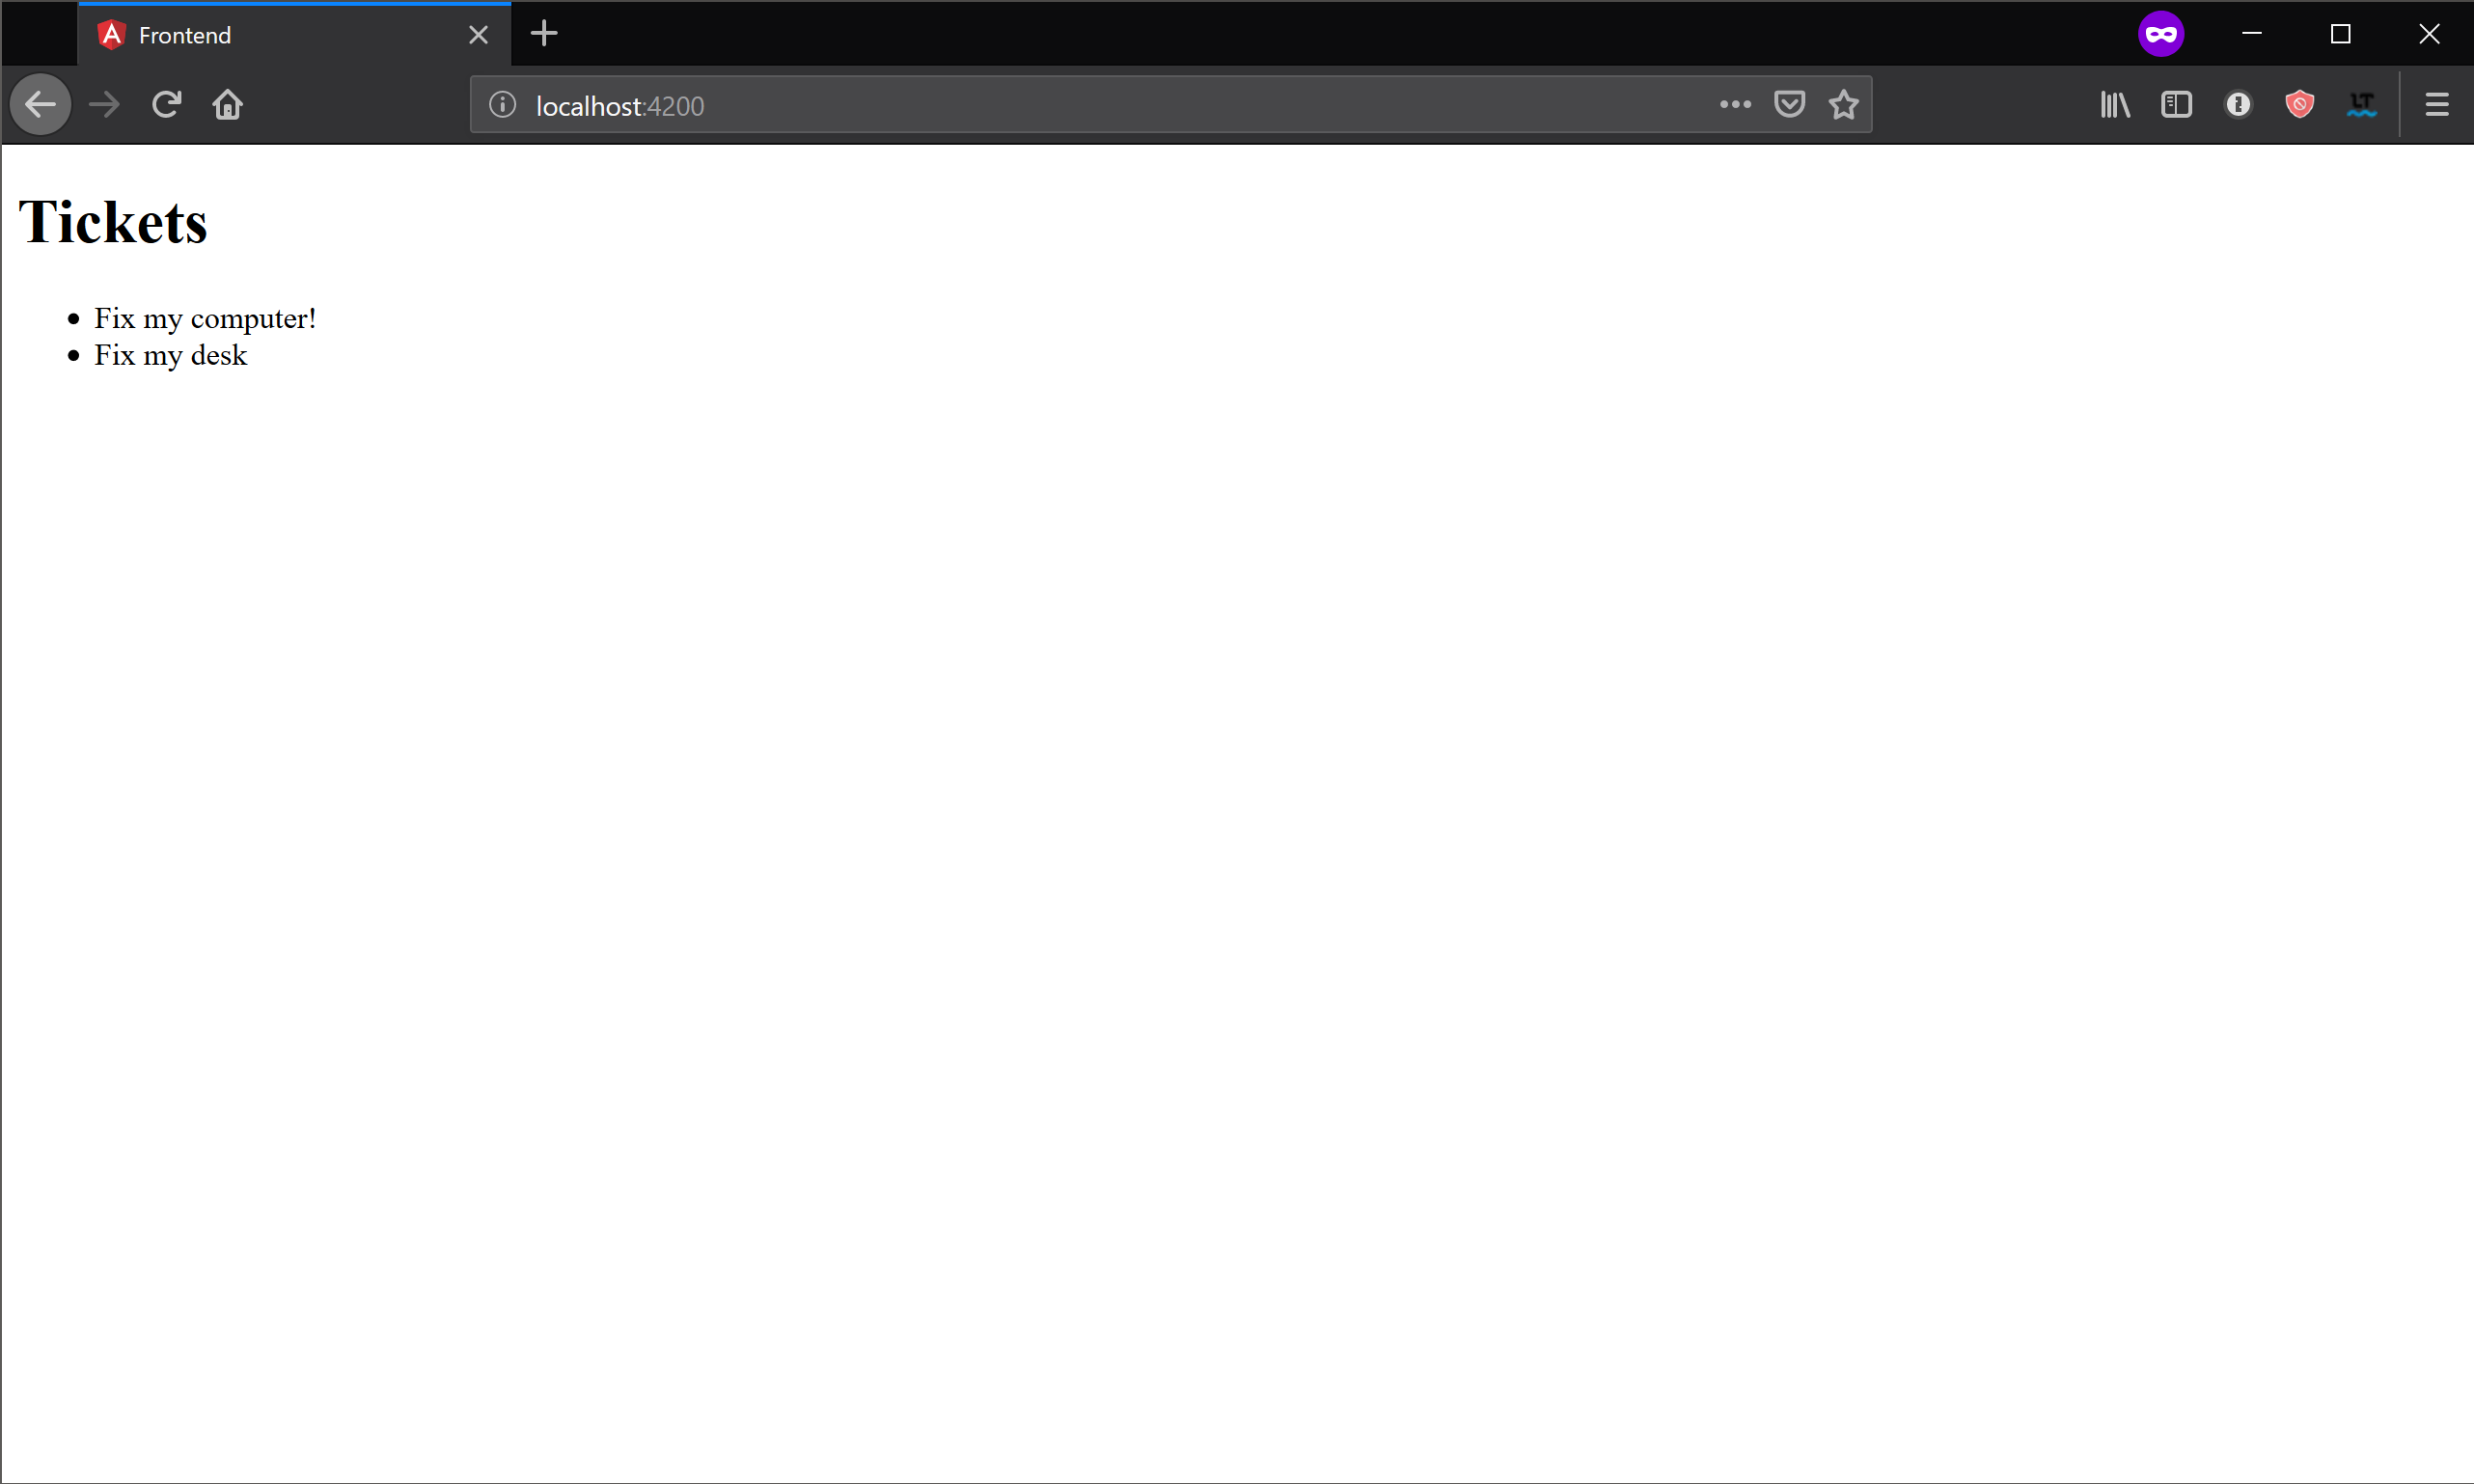
有一个小问题。该Todo接口被定义了两次:一次是在前端,一旦在后端。这种重复将不可避免地导致两个接口不同步,这意味着运行时错误将会蔓延。最好共享此接口。
在前端和后端之间共享代码
在Nx中,代码通过创建库来共享。因为所有内容都在一个存储库中,所以可以导入库而无需将它们发布到注册表。
通过以下方式创建新库:
ng g @nrwl/workspace:library data # This generates a barebone library with only Typescript setup
<workspace name>/
├── apps/
│   ├── frontend/
│   ├── frontend-e2e/
│   └── api/
├── libs/
│   └── data/
│       ├── src/
│       │   ├── lib/
│       │   │   └── data.ts
│       │   └── index.ts
│       ├── jest.config.js
│       ├── tsconfig.app.json
│       ├── tsconfig.json
│       ├── tsconfig.spec.json
│       └── tslint.json
├── nx.json
├── package.json
├── tools/
├── tsconfig.json
└── tslint.json
接下来,Todo进入libs/data/src/lib/data.ts:
export interface Todo {
  title: string;
}
最后,更新前端和后端以从库中导入接口。
更新apps/frontend/src/app/app.component.ts:
import { Observable } from 'rxjs';
import { Component } from '@angular/core';
import { HttpClient } from '@angular/common/http';
import { Todo } from '@myorg/data';

@Component({
  selector: 'myorg-root',
  template: `
    <h1>Todos</h1>
    <ul>
      <li *ngFor="let t of (todos | async)">{{ t.title }}</li>
    </ul>
  `
})
export class AppComponent {
  todos: Observable<Todo[]>;

  constructor(http: HttpClient) {
    this.todos = http.get<Todo[]>('/api/todos');
  }
}
更新apps/api/src/app/app.service.ts:
import { Injectable } from '@nestjs/common';
import { Todo } from '@myorg/data';

@Injectable()
export class AppService {
  getTodos(): Todo[] {
    return [{ title: 'Fix my computer!' }, { title: 'Fix my desk' }];
  }
}
更新apps/api/src/app/app.controller.ts:
import { Controller, Get } from '@nestjs/common';

import { Todo } from '@myorg/data';

import { AppService } from './app.service';

@Controller()
export class AppController {
  constructor(private readonly appService: AppService) {}

  @Get('todos')
  getTodos(): Todo[] {
    return this.appService.getTodos();
  }
}
在这个重构之后,后端和前端将共享相同的定义。能够将代码分解为许多具有定义良好的公共API的小型库,然后可以在后端和前端使用,这是Nx的一个关键特性。
应用依赖关系
拥有前端代码和后端代码已经令人惊叹了。只需几分钟,您就拥有了一个可以构建多个前端和后端应用程序并在它们之间共享代码的存储库。
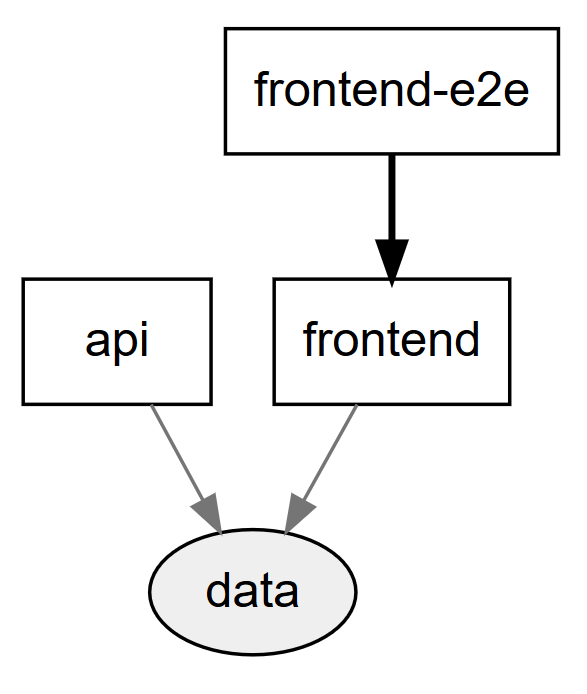
但Nx可以做的远不止这些。在Nx中,您的库,后端应用程序,前端应用程序都是相同依赖关系图的一部分,您可以通过以下方式查看:
npm run dep-graph
创建Libs
Libs不仅仅是在Nx中共享代码的一种方式。它们也可用于将代码分解为具有定义良好的公共API的小单元。
公共API
每个Libs都有一个index.ts文件,用于定义其公共API。其他应用程序和库应该只访问index.ts导出的内容。图书馆的其他所有内容都是私密的
UI Libs
为了说明库的有用性,可以创建一个Angular ui库:
ng g @nrwl/angular:lib ui
你应该看到以下内容:
myorg/
├── apps/
│   ├── todos/
│   ├── todos-e2e/
│   └── api/
├── libs/
│   ├── data/
│   └── ui/
│       ├── src/
│       │   ├── lib/
│       │   │   ├── ui.module.spec.ts
│       │   │   └── ui.module.ts
│       │   └── index.ts
│       ├── jest.conf.js
│       ├── tsconfig.app.json
│       ├── tsconfig.json
│       ├── tsconfig.spec.json
│       └── tslint.json
├── nx.json
├── package.json
├── tools/
├── tsconfig.json
└── tslint.json
该libs/ui/src/lib/ui.module.ts文件如下所示:
import { NgModule } from '@angular/core';
import { CommonModule } from '@angular/common';

@NgModule({
  imports: [CommonModule]
})
export class UiModule {}
添加组件
通过运行以下命令将组件添加到新创建的ui库:
ng g component todos --project=ui --export
myorg/
├── apps/
│   ├── todos/
│   ├── todos-e2e/
│   └── api/
├── libs/
│   ├── data/
│   └── ui/
│       ├── src/
│       │   ├── lib/
│       │   │   ├── todos/
│       │   │   │   ├── todos.component.css
│       │   │   │   ├── todos.component.html
│       │   │   │   ├── todos.component.spec.ts
│       │   │   │   └── todos.component.ts
│       │   │   ├── ui.module.spec.ts
│       │   │   └── ui.module.ts
│       │   └── index.ts
│       ├── jest.conf.js
│       ├── tsconfig.app.json
│       ├── tsconfig.json
│       ├── tsconfig.spec.json
│       └── tslint.json
├── nx.json
├── package.json
├── tools/
├── tsconfig.json
└── tslint.json
添加todos输入libs/src/lib/todos/todos.component.ts:
import { Component, OnInit, Input } from '@angular/core';
import { Todo } from '@myorg/data';

@Component({
  selector: 'myorg-todos',
  templateUrl: './todos.component.html',
  styleUrls: ['./todos.component.css']
})
export class TodosComponent implements OnInit {
  @Input() todos: Todo[];

  constructor() {}

  ngOnInit() {}
}
并更新todos.component.html以显示给定的待办事项:
<ul>
  <li *ngFor="let t of todos">{{ t.title }}</li>
</ul>
使用UI库,app挂载lib
现在导入UiModule到apps/todos/src/app/app.module.ts:
import { BrowserModule } from '@angular/platform-browser';
import { NgModule } from '@angular/core';

import { AppComponent } from './app.component';
import { HttpClientModule } from '@angular/common/http';
import { UiModule } from '@myorg/ui';

@NgModule({
  declarations: [AppComponent],
  imports: [BrowserModule, HttpClientModule, UiModule],
  providers: [],
  bootstrap: [AppComponent]
})
export class AppModule {}
更新app.component.html:
<h1>Todos</h1>

<myorg-todos [todos]="todos"></myorg-todos>

<button (click)="addTodo()">Add Todo</button>
app和Libs
根据项目复杂度可将架构拆分为多个app,对应的app可以挂载对应的lib。
app配置依赖注入和连接Libs。它们不应包含任何组件,服务或业务逻辑。
Libs包含服务,组件,实用程序等。它们具有定义良好的公共API。
典型的Nx工作区比app具有更多的Libs,因此要特别注意libs目录的组织。
将特定于app的libs放入与app名称匹配的目录中是一个很好的约定:
happynrwl/
├── apps/
│   ├── happynrwlapp/
│   ├── happynrwlapp-e2e/
│   ├── adminapp/
│   └── adminapp-e2e/
├── libs/
│   ├── happynrwlapp/
│   │   ├── feature-main/
│   │   ├── ui-table/
│   │   └── utils-testing/
│   ├── adminapp/
│   │   ├── feature-main/
│   │   ├── feature-login/
│   │   ├── ui/
│   │   └── utils-testing/
│   └── shared/
│       ├── ui/
│       └── utils-testing/
├── tools/
├── angular.json
├── nx.json
├── package.json
├── tsconfig.json
└── tslint.json
对于较大的项目,最好将库分组到应用程序部分:
happynrwl/
├── apps/
├── libs/
│   ├── happynrwlapp/
│   │    ├── registration/
│   │    │   ├── feature-main/
│   │    │   ├── feature-login/
│   │    │   ├── ui-form/
│   │    │   └── utils-testing/
│   │    ├── search/
│   │    │   ├── feature-results/
│   │    │   └── utils-testing/
│   │    └── shared/
│   │        └── ui/
│   ├── adminapp/
|   └── shared/
│       ├── ui/
│       └── utils-testing/
├── tools/
├── angular.json
├── nx.json
├── package.json
├── tsconfig.json
└── tslint.json
这里:
happynrwlapp/registration/feature-main- 在一个地方使用的范围库
happynrwlapp/shared/ui- 在单个应用程序中使用的共享库
shared/ui- 跨应用程序使用的共享库
懒加载库
Lazing加载此代码有助于捆绑包大小,减少应用程序的启动时间:
ng g @nrwl/angular:lib todo-list-shell --router --lazy --parentModule=apps/todos/src/app/app.module.ts
- --routing:添加路由器配置。
- --lazy:RouterModule.forChild设置为true时添加,设置为false时为简单路径数组。
- --parentModule:更新父模块。
myorg/
├── apps/
│   ├── todos/
│   ├── todos-e2e/
│   └── api/
├── libs/
│   └── todo-list-shell/
│       ├── jest.conf.js
│       ├── src/
│       │   ├── lib/
│       │   │  ├── todo-list-shell.module.spec.ts
│       │   │  └── todo-list-shell.module.ts
│       │   └── index.ts
│       ├── tsconfig.app.json
│       ├── tsconfig.json
│       ├── tsconfig.spec.json
│       └── tslint.json
├── nx.json
├── package.json
├── tools/
├── tsconfig.json
└── tslint.json
todo-list-shell.module.ts:
import { NgModule } from '@angular/core';
import { CommonModule } from '@angular/common';
import { RouterModule } from '@angular/router';

@NgModule({
  imports: [
    CommonModule,

    RouterModule.forChild([
      /* {path: '', pathMatch: 'full', component: InsertYourComponentHere} */
    ])
  ]
})
export class FeatureShellModule {}
添加组件,现在将一个组件添加到新创建的todo-list-shell库中:
ng g component main --project=todo-list-shell
myorg/
├── apps/
│   ├── todos/
│   ├── todos-e2e/
│   └── api/
├── libs/
│   └── todo-list-shell/
│       ├── jest.conf.js
│       ├── src/
│       │   ├── lib/
│       │   │  ├── todo-list/
│       │   │  │   ├── todo-list.component.css
│       │   │  │   ├── todo-list.component.html
│       │   │  │   ├── todo-list.component.spec.ts
│       │   │  │   └── todo-list.component.ts
│       │   │  ├── todo-list-shell.module.spec.ts
│       │   │  └── todo-list-shell.module.ts
│       │   └── index.ts
│       ├── tsconfig.app.json
│       ├── tsconfig.json
│       ├── tsconfig.spec.json
│       └── tslint.json
├── nx.json
├── package.json
├── tools/
├── tsconfig.json
└── tslint.json
接下来,更新TodoListShellModule以使用组件:
import { NgModule } from '@angular/core';
import { CommonModule } from '@angular/common';
import { RouterModule } from '@angular/router';
import { TodoListComponent } from './todo-list/todo-list.component';

@NgModule({
  imports: [
    CommonModule,
    RouterModule.forChild([
      { path: '', pathMatch: 'full', component: TodoListComponent }
    ])
  ]
})
export class TodoListShellModule {}
app.module.ts通过使用loadChildren属性添加惰性路由:
import { BrowserModule } from '@angular/platform-browser';
import { NgModule } from '@angular/core';

import { AppComponent } from './app.component';

// You can add multiple routes as your needs
const routes: Routes = [
  {
    path: 'list',
    loadChildren: () =>
      import('@myorg/todo-list-shell').then(m => m.TodoListShellModule)
  }
];

@NgModule({
  declarations: [AppComponent],
  imports: [BrowserModule, RouterModule.forRoot(routes)],
  providers: [],
  bootstrap: [AppComponent]
})
export class AppModule {}
快捷使用
创建 app 和 lib
创建App:
yarn ng g @nrwl/angular:application demo --routing --style=less。添加参数 --dry-run (或 -d 简写)来查看当前操作将会创建的文件
创建Lib:
yarn ng g lib demo --routing --lazy --parent-module=apps/demo/src/app/app.module.ts --directory=demo/views。
修改 angular.json:
{
  "projects": {
    "demo": {
      "architect": {
        "build": {
          "options": {
          "styles": [
              "apps/demo/src/styles.less", // 引用当前 app 的样式
+             "styles/styles.less"          // 引用全局公共样式
            ],
          },
          "configurations": {
            "production": {
+              "baseHref": "/",
            }
          }
        },
        "serve": {
          "options": {
+            "port": 5001, // 每个 app 设置不一样的端口
+            "proxyConfig": "proxy.conf.js",
          }
        }
      }
    }
  }
}